Unity Editor Hello, Unity Dev’s I am back again with Part 3 of Creating custom editor window in unity. In today’s blog we will look around: “How to load Textures files from resource folder and create our buttons.” Step1. Gather some images related to the headers of our sub-toolbars or if you are good at photoshop create some, btw I have zero skills when it comes to photoshop so I am goanna gather images from internet. Once we have are images ready drag them into respected folder under root folder Resources. It will look something like this: Step2. Scripting Now we need to create a function which will be called once whenever we will switch from sub-tabs. Hmmmm, so how to do that!!! First create a function and name it as per your want’s I have named mine as: “MakeWindow” Then write down these lines: Create two variables a list: to store our loaded texture...
In unity one can move a
gameobject with few different ways some of them are:
1st
way
transform.Translate(0, 0, 2);
By writing this piece of
line your object will start moving forward in z Direction.
2nd
way
is using vector 3
transform.position += new
Vector3(0, 0, 2);
By writing this piece of
line the gameobject moves same as in above, this line adds 2 on z in every
frame of transform.postion.
Note (Transform
with capital ‘T’ is used for type declaration like: Transform Player-this will
make a player variable of type transform, whereas transform starting with small
‘t’ is used to call the gameobject on which the script is attached or to use the
transform property of any gameobject.)
For e.g.
Gameobject Player;
Player.transform.position;
3rd
way
transform.Translate(Vector3.forward);
By writing this line
gameobject on whom script is attach to will start moving forward.
To move a gameobject
backward simply write- transform.translate(-Vector3.forward) or transform.translate(Vector3.back);
Same applies for left, right,
up and down. Just replace forward from
the direction you want to move.This are known as
shorthand.
Finding Distance
Now finding distance
between two gameobject can come handy in many scenarios.
Suppose we have to create
an AI for enemy and want a good AI behavior related to distance between player
and enemy say run when distance is more and walk when distance is less hide
when in range, etc.
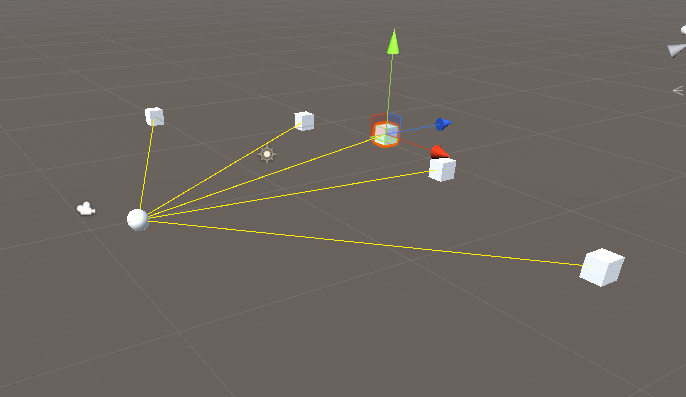
Example-
In this example I have created few boxes and a sphere. The yellow line is drawn
from sphere to all boxes if and only if they are within the specific distance.
Step1:
Scene setup create few cubes and add a tag to all of them with “Objects”.

Create a sphere and add a
script to it.
Step2:
Write the following code. Attach the script to sphere.

Run the scene.
Try moving any cube back
and forth. Tadaaa!! We are done It’s
as simple as that.
Post is open for
suggestion/edits and do comment down below about how you liked the post.
Comments
Post a Comment