Unity Editor Hello, Unity Dev’s I am back again with Part 3 of Creating custom editor window in unity. In today’s blog we will look around: “How to load Textures files from resource folder and create our buttons.” Step1. Gather some images related to the headers of our sub-toolbars or if you are good at photoshop create some, btw I have zero skills when it comes to photoshop so I am goanna gather images from internet. Once we have are images ready drag them into respected folder under root folder Resources. It will look something like this: Step2. Scripting Now we need to create a function which will be called once whenever we will switch from sub-tabs. Hmmmm, so how to do that!!! First create a function and name it as per your want’s I have named mine as: “MakeWindow” Then write down these lines: Create two variables a list: to store our loaded texture...
Editor Window (Part 1)


In unity, Editor
windows are windows which are created by developers to be used by developers in
Editor, it’s more like a plugin for Unity editor made by You.
By learning Editor
Window scripting, one is able to create any type of windows to ease their work
while working in editor.
Official Definition:
“Create your own custom editor window that can float free or be
docked as a tab, just like the native windows in the Unity interface.”
I am going to
start a series which will cover almost all the topics related to EDITOR WINDOW.
In this series I am going to make a “LevelDesigner” plugin dittoing the zoo
tycoon GUI and functionalities.
Fortunately, we
will learn about: Creating Editor window, creating all types of GUI, Modifying
GUI Skin, Instantiating prefabs loaded from resources, and lots more….
So, tag along with
me till the end of this series and let’s see How far we can Go.
I have also just
started learning Unity Editor Scripting so it’s not an Expert Blog, we are walking
in this journey together.
So, let’s get Started
….
Create Necessary
folders
Step1. Create
a folder named “Editor”: This folder will contain all the scripts which we want
to run in editor.
Step2. Create
a folder named “Resources”: This folder will contain our all texture, prefabs
which we will load using our scripts.
Scripting
Step1. Create a
Script name it accordingly, mine is called AssetManager.
Step2. Add library
“using UnityEditor”. After that remove that Monobehaviour and write
EditorWindow.
Step3. Write down
this piece of code.

Line no. 32 will
create an option named Zoo Tycoon and a dropdown panel with option
Assets manager in Unity Engine Toolbar.
Line no.33 starts
a function, you can name this function anything, just make sure it’s a static
function.
After that create
a variable named window of type of your script name and initialize it.
To show your
window just write “window.show”.
It will look something
like this in unity.


Step4. Creating GUI
for our Window
To create the GUI
for over window we will use OnGui(), and all the code will come within, related
to our GUI.
What we are going
to MIMIC is something like this:

So 1st
we will make a Toolbar.
Declare two global
variables as shown below:

toolbarStrings
will hold the name of our toolbar’s headers, and _toolbar_sel will hold the
value of current toolbar selected.
After that in Your
OnGui()
Write down these
lines.

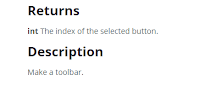
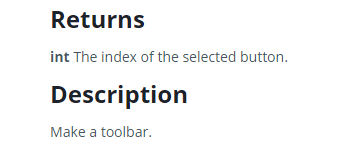
In this the main code
is on line no. 43 which creates a toolbar with the names stored in are array, and
then initialize the current selected toolbar to _toolbar_sel.
GUILayout.BeginHorizontal()
is used to make sure our GUI is made horizontally instead of vertically.

GUILayout.EndHorizontal() is use to help
understand compiler that code after this will be made vertically.

GUILayout.Toolbar()
is used to create a Toolbar.
Save your script
and switch back to unity.

That’s all for
Today
In next Blog of our series Editor Window we
will learn to create sub toolbar in our toolbar.
Till Than Happy Coding!!!
Thanks for sharing..,
ReplyDelete